
$300? Don't I wish?
Hey all!
I wanted to share the progress of my twin stick build (using old NES Quick Shot controllers), in case it helps someone else working on the same thing. I wrote these two posts over the course of a few days, so it may be odd in places.
I was inspired by the cake pan twin sticks and, as awesome as they are, I wanted something a little less cakey. It's already been done, right?
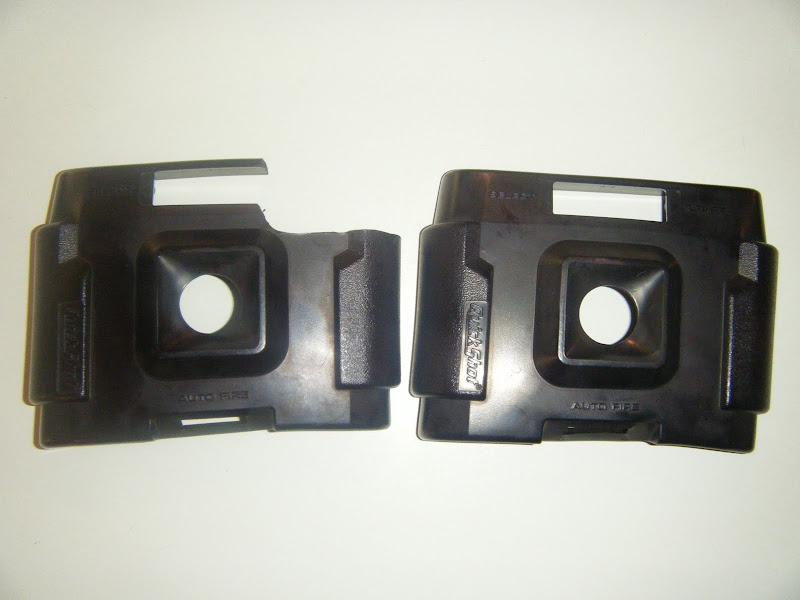
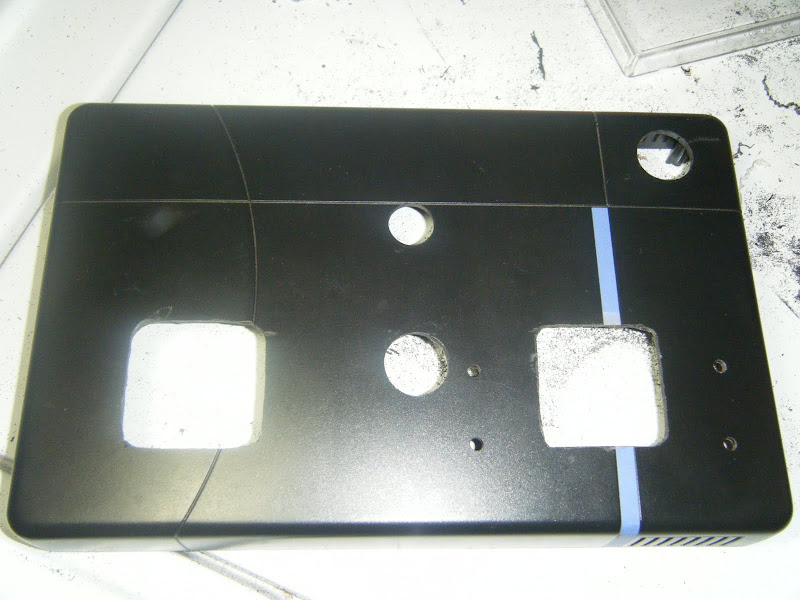
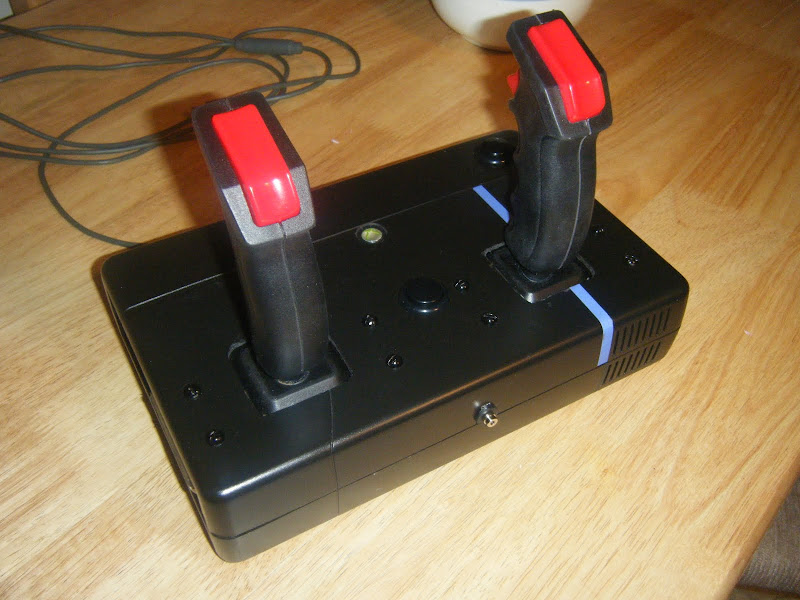
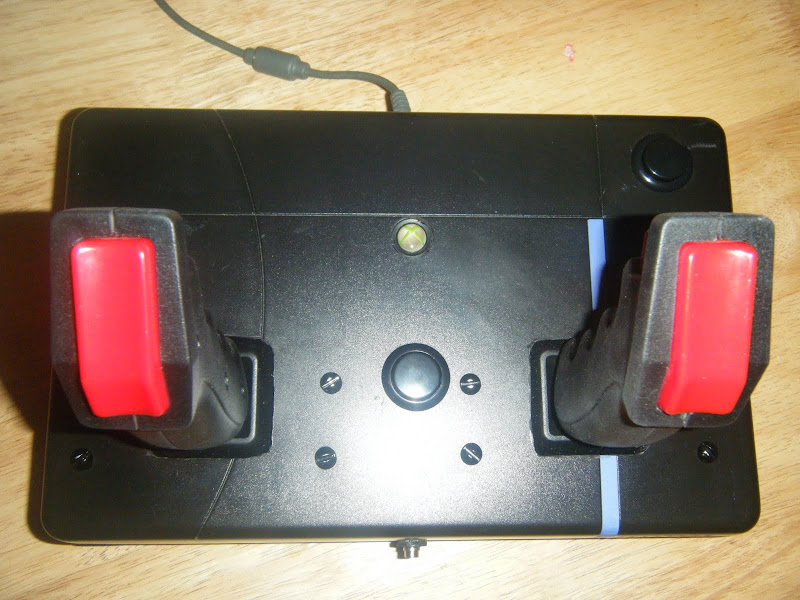
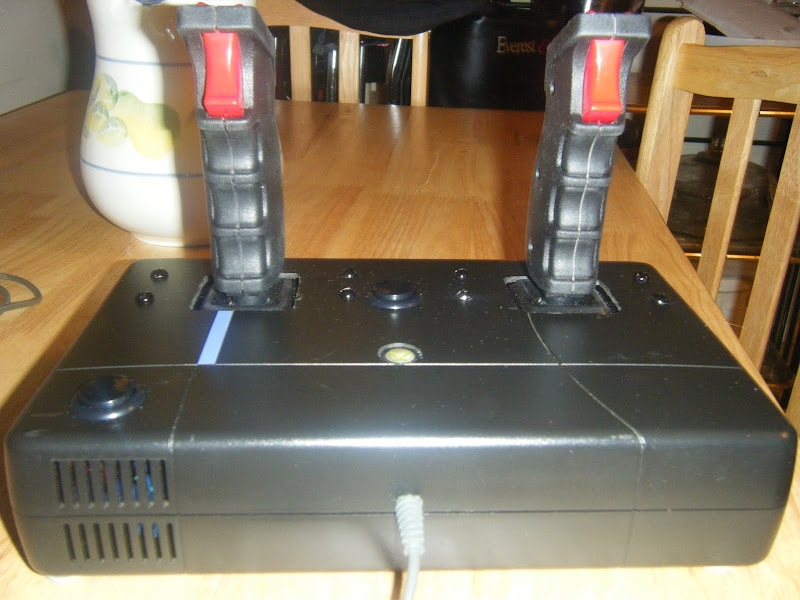
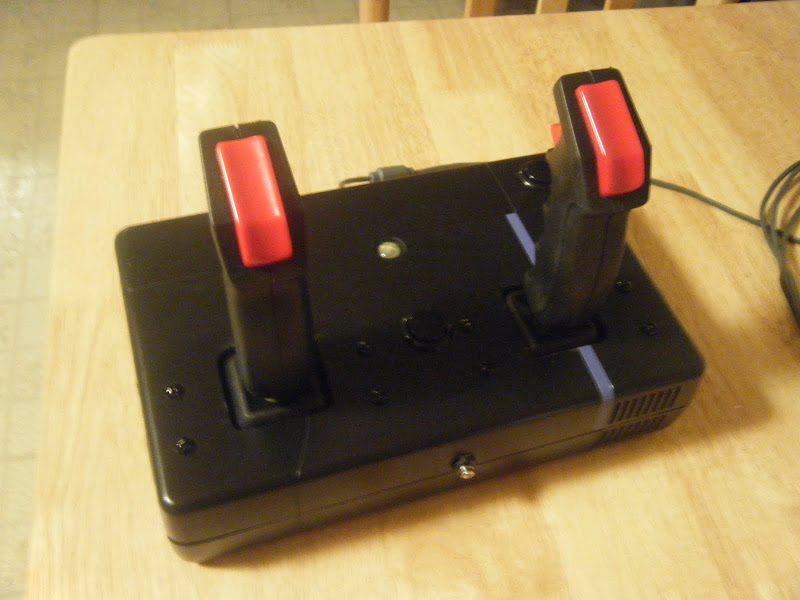
First off, I'm starting off with the Madcatz "retro" arcade stick:

Awful controller, but easy to mod.
With the help of MentholMoose, I was able to get my wiring mistakes sorted out. (You da man!)
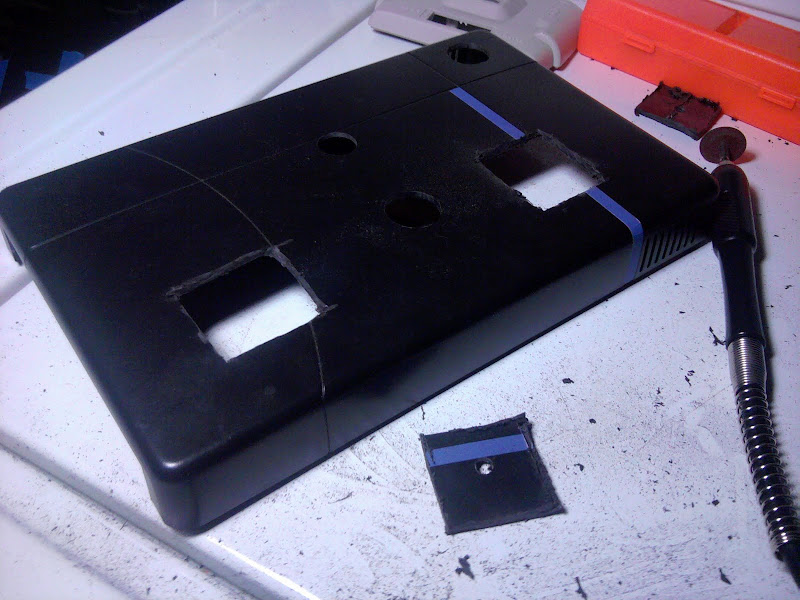
I drilled the 360 guide button hole in the (ABS) plastic case using a 5/8 spade bit, at a very low speed, without really applying pressure. It's a slow process, so be patient, and take breaks to remove the dust and let the plastic cool. I hadn't really seen anybody salvage the guide button in one of these projects, so I wanted to give it a try. The bit isn't the right size, it's slightly smaller, but I used a dremel with a sanding drum to widen the hole:
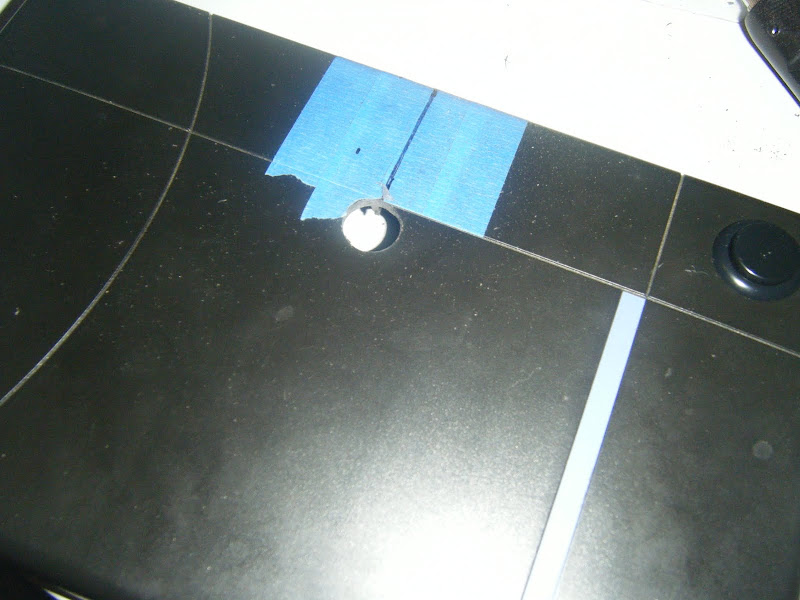
Now, to flush mount the guide button you need to grind the analog stick nubs down to nothing. I did this by clipping them as short as I could with wire cutters, then grinding them with the same sanding drum. You would think that the analog would flop all over the place while you're grinding it, but it didn't. They basically stayed perfectly still without me having to do anything. Here's the result, though probably hard to see:
(For the uninitiated: each of the wires I soldered on corresponds with a button or direction on the xbox pad)
They made cool sparks that made me feel like a workin' man!
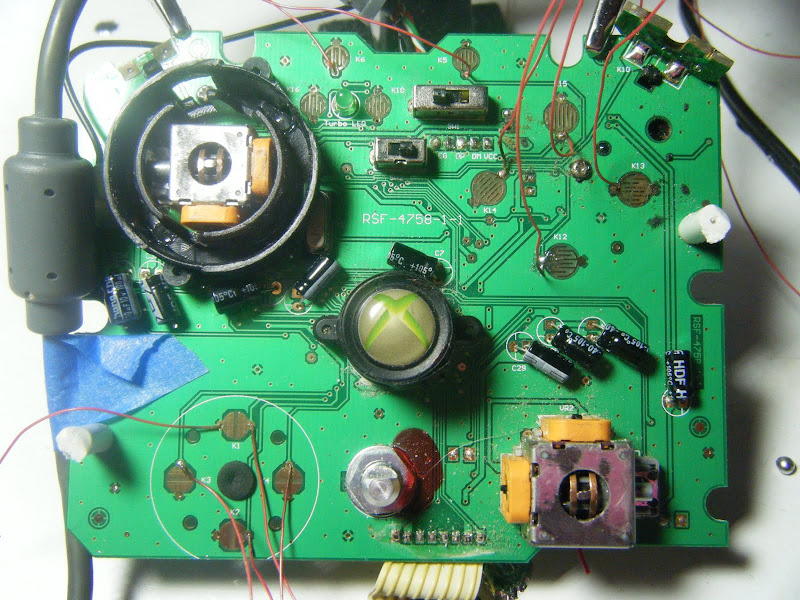
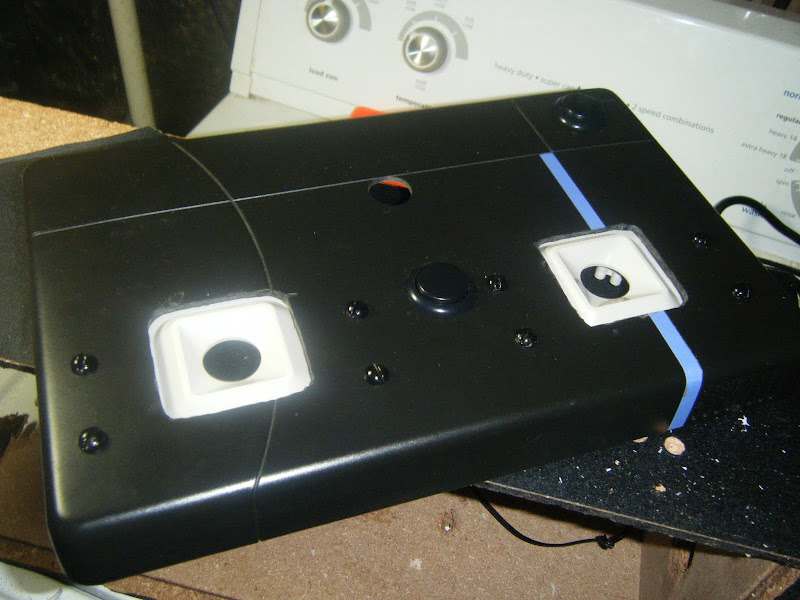
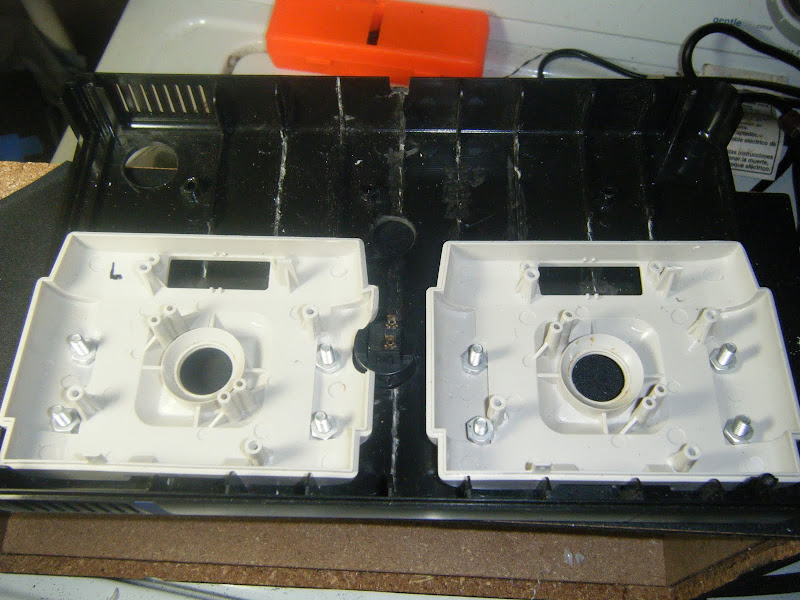
The added benefit of leaving the analog sticks on the board is that, after they're ground down, they make perfect supports for the pcb, and position it at the perfect angle for flush mounting (albeit on only 2 corners....you still need more support. See the white posts I clipped off the controller shell and screwed back on?) so that once you've drilled your guide hole, you can drop the board right in and see how it's going to look:
(I chewed the guide button bezel up a little doing something I shouldn't have been doing)
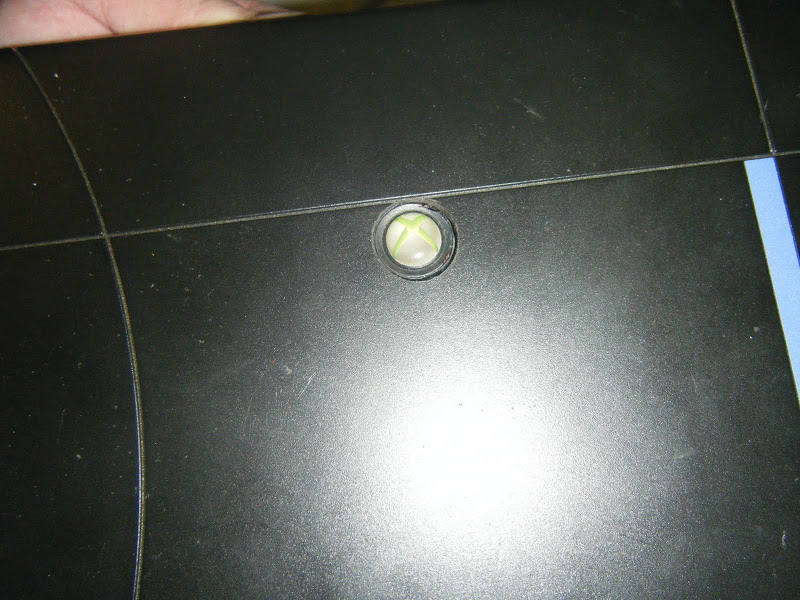
and here's what it looks like from the other side:
(with ultra-sturdy masking tape mounting)
The Start & Back buttons I used are 24mm Sanwa snap-in buttons (that I had laying around to fix Neo Geo controllers), and I used another wrong-sized spade bit for those, a 7/8. Insert dremel, repeat. If you do this, and you want to avoid scratching your case (as the sanding bit will skitter out of the hole if you sand too close to the drum edge), stick your drum in further, so if it skitters, it will be out of the other side, & your bit shaft will just whack against the inside of your hole, instead of scratching your case.
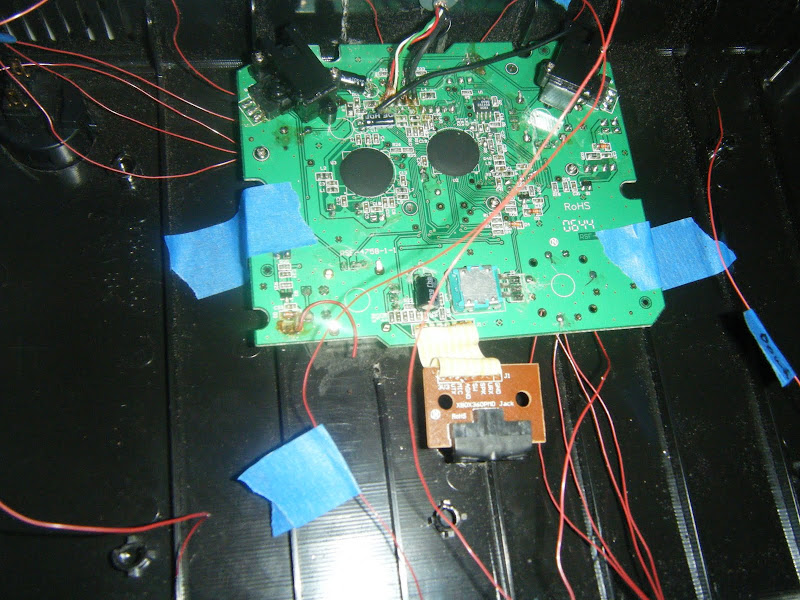
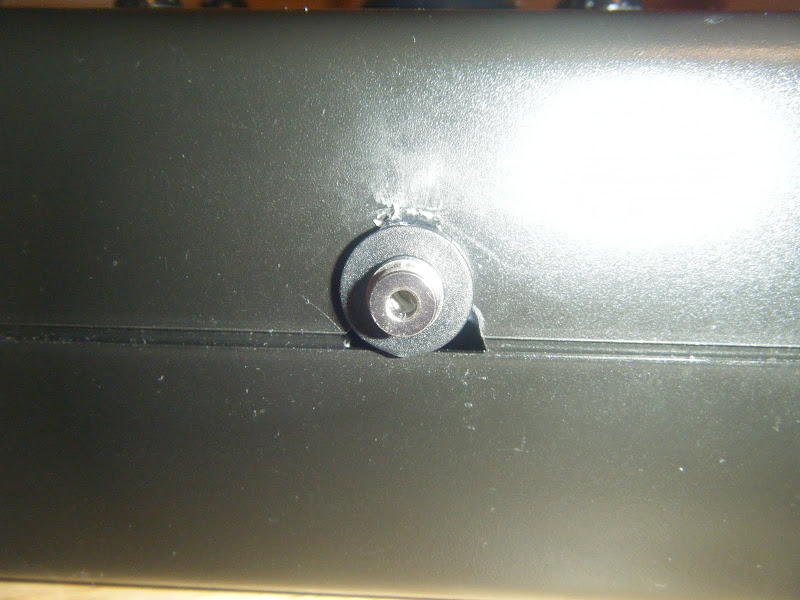
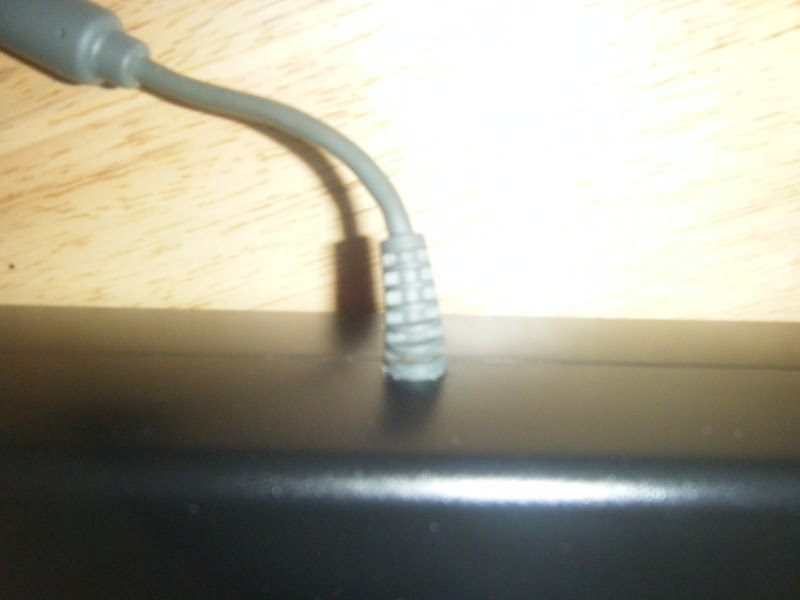
Now for the XBox usb cable, to reuse the rubber flexi-boot thing (and give it a nice professional look), you want to cut a quarter inch notch out of your case (assuming it's thin enough to mount it using its original slot). I masking taped it to avoid scratching, and used a Dremel 420 cutoff wheel:
(pay no attention to the sharpie on the left)
For the last cut, I lightly scored it with the cutoff wheel, then snapped it loose with a pair of needle nose pliers, then used a bastard file on the notch to clean it up. If you refer back to the pic of the board in the case, you can just barely see the boot in place (forgot to snap pic).
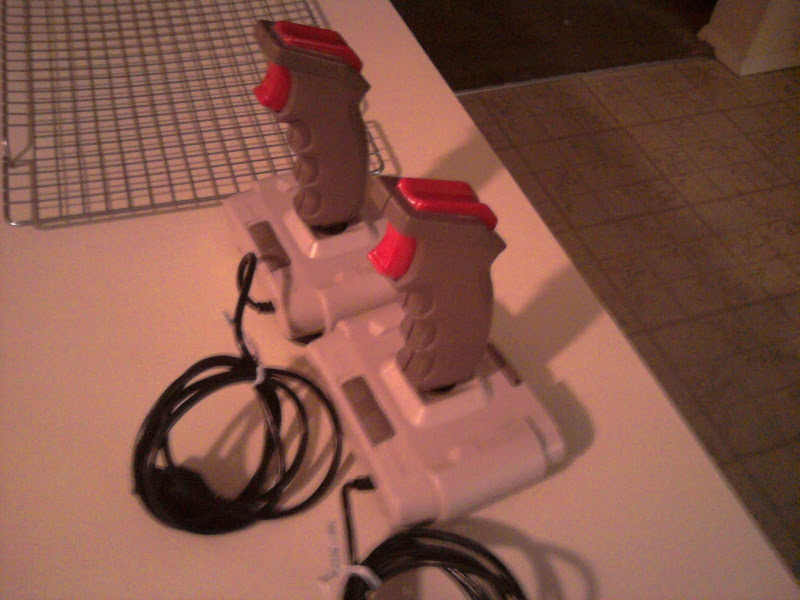
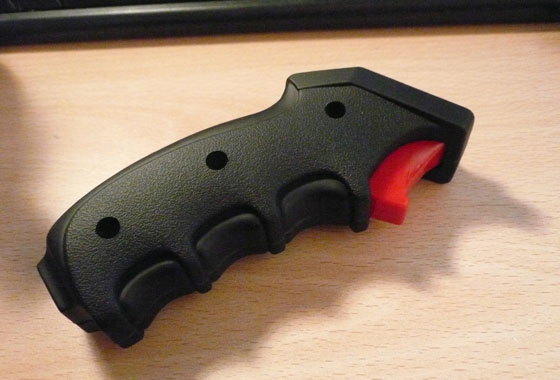
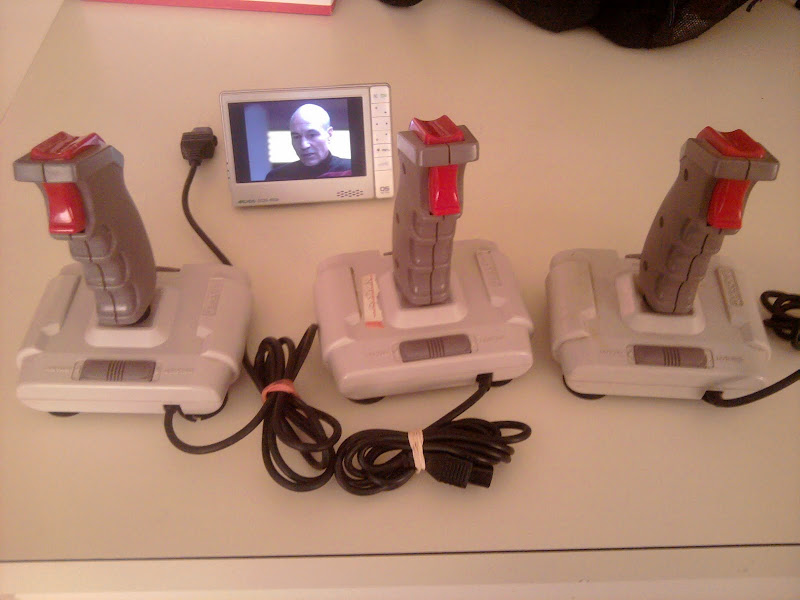
So for the Quickshot NES joysticks, I have to say I have a bit of a love/hate relationship with them after working them (at least the pair I bought).
Quickshots, I stab at thee!
The main problem with the ones I got is that when I tried to unscrew the grips from the stick, the plastic posts just broke loose inside instead. I guess that's the danger of 20 year old plastic. I bought them as a pair, so maybe whoever had them last tightened them down like crazy. I've heard from at least one other person who was able to open a pair up with no problems. It's not like I went buttnuts on the screwdriver or anything. After the first one did it, I was super duper careful trying to unscrew the 2nd stick, and it still broke. Oh well, unless I buy another pair, I'll figure out some way to affix them. The posts that pass through the inner joystick are still intact, so I could just use glue or double sticky tape to attach them.
That's old
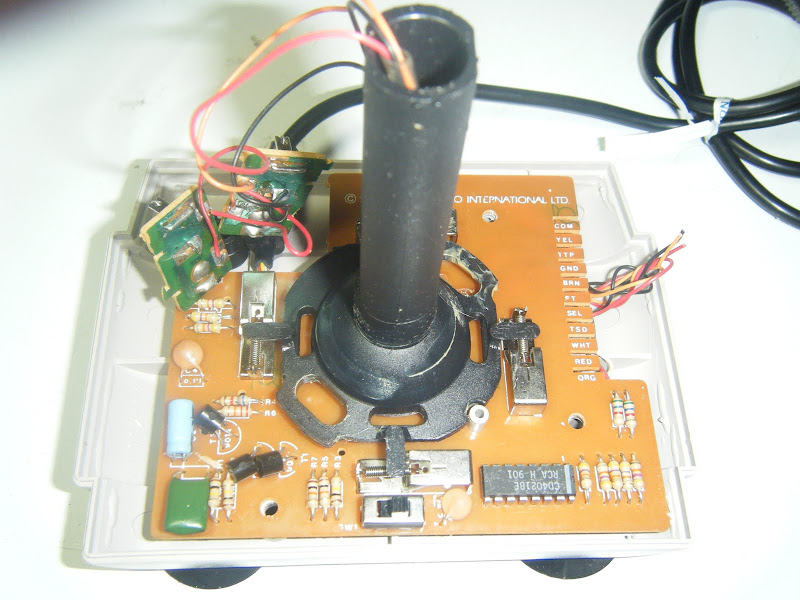
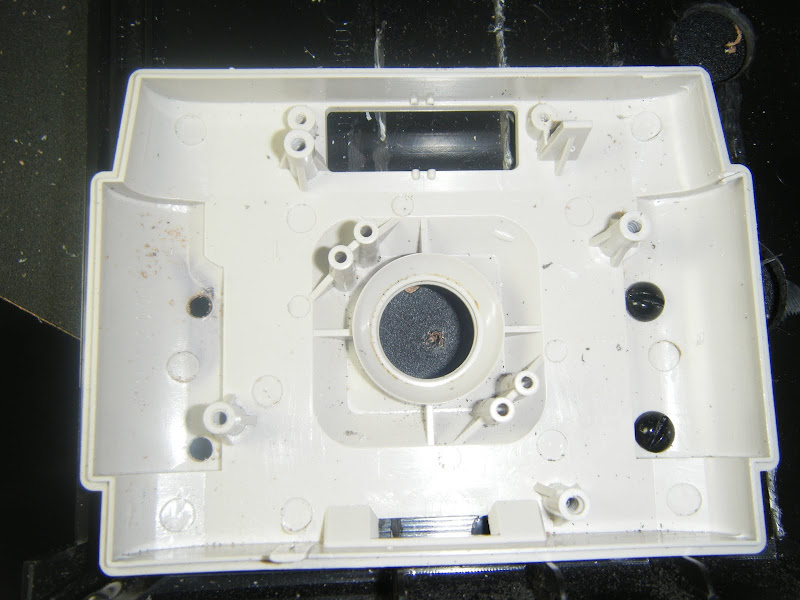
One thing I've given a lot of thought to is the joystick housing on these. You can either mount the joystick on something like briefcase guy (not an option for me) or mount them in a case with the tops of the stick exposed, like cake pan guy. You can't really do it without them because the function of the stick is dependant on the top of the casing (it's sort of a spherical swivel, I suppose?).
In case you're like "Spherical swivel? WTF??"
While trying to research ways of doing this well, I ran across tubbygaijin's (unfinished) twin stick blog:
http://www.tubbygaijin.co.uk/blog/games ... worklog-4/
I became particularly envious when I saw this:
That's pimp!
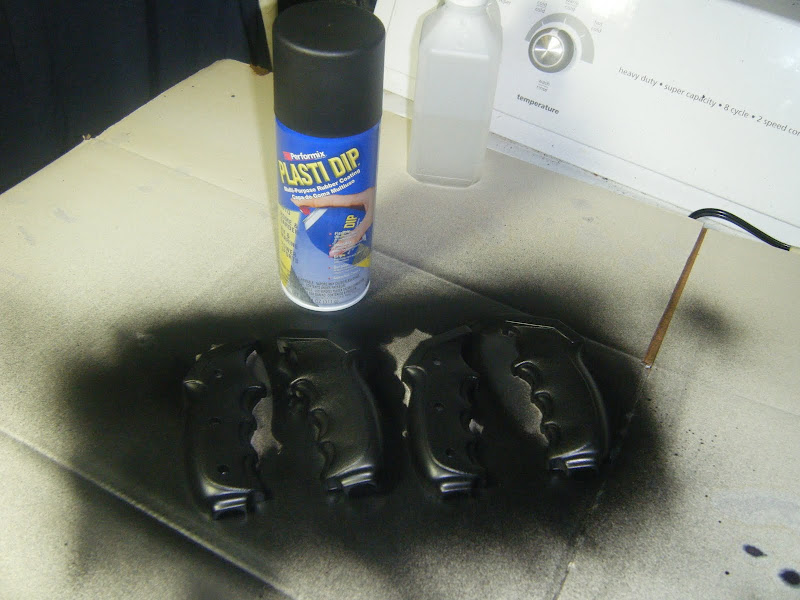
I messaged him about it, and apparently he used hobby paint and sealant (see blog comments). Being a man who prides himself on laziness and cutting corners, I decided this was too much work for me, and went about looking for easier ways to paint plastic. I then learned about Krylon Fusion, which is especially for plastics. After reading a gun forum where a few people complained about it wearing off on the gun's grip (uh oh!), I decided that Fusion probably wasn't something I wanted to experiment with.
Then my googling took a sharp turn toward left field when I googled "how to dye plastic". The answer? Rit Dye!
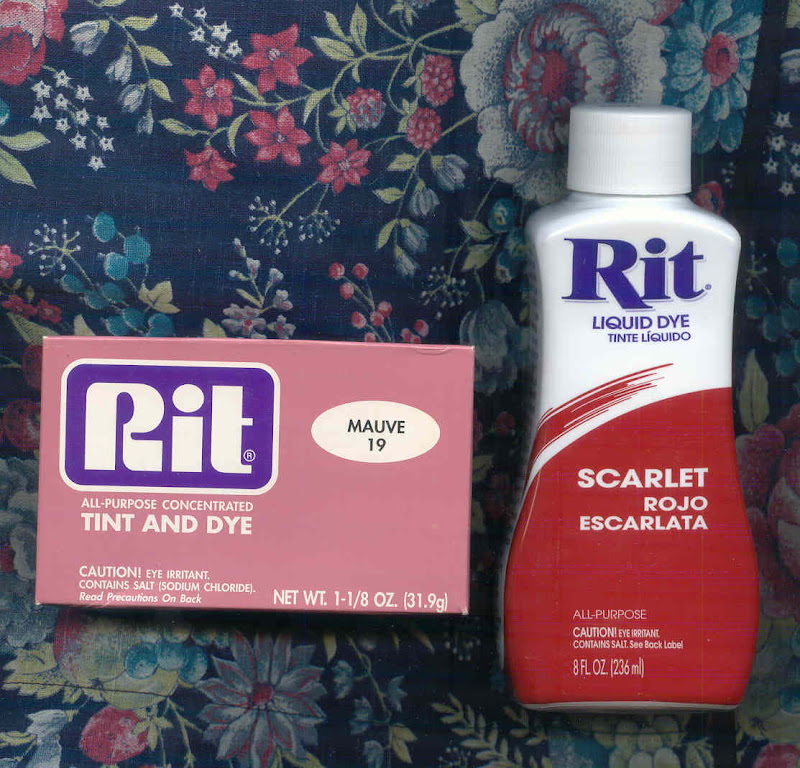
Yes you hippies, it's the same stuff you tie dye your shirts with
So yeah. I learned this on a paintball forum, but apparently it's practiced in the RC car world quite often. I even found some youtube videos about it. This one was particularly surreal:
http://www.youtube.com/watch?v=CbhudOFO-8Q
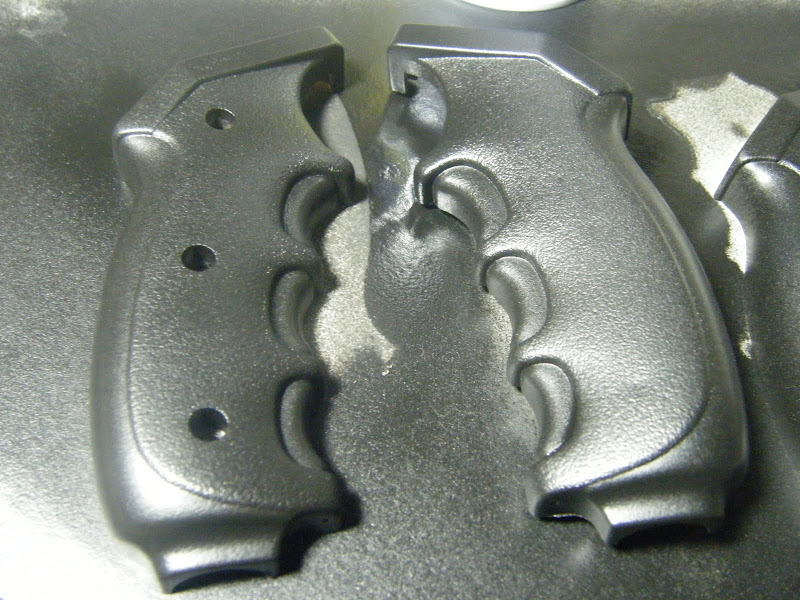
Unlike paint, the dye bonds to the plastic, so it can't chip off like paint. Unless you gouge below the surface of the plastic, it's gonna stay black.
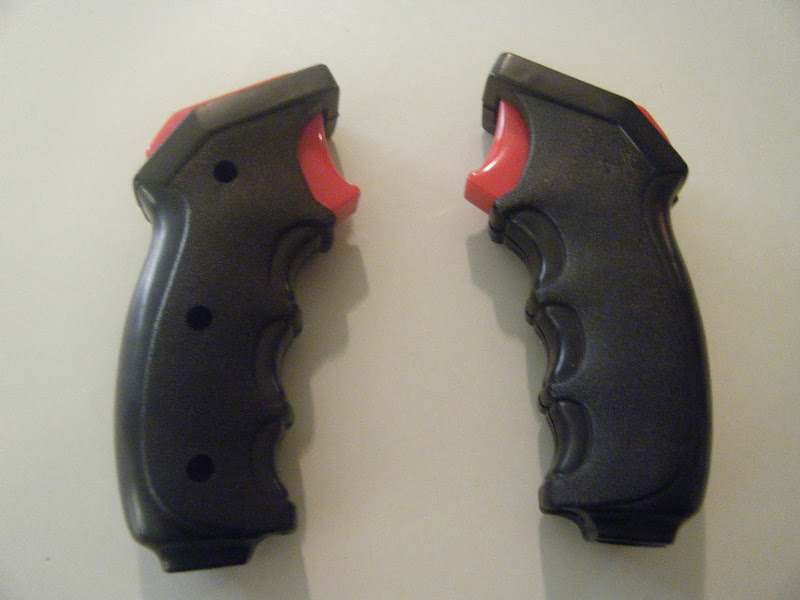
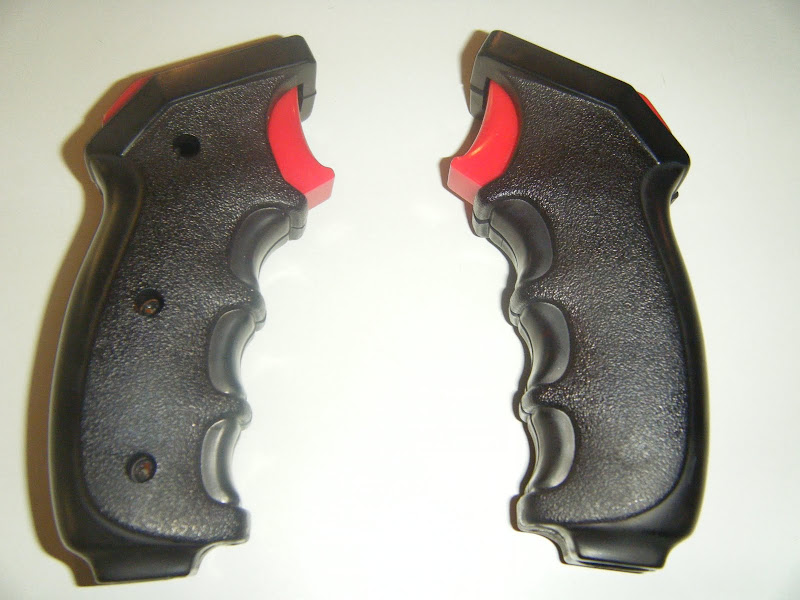
The great thing about Rit is that you don't have to order it online. A bunch of different stores carry it, and it's only a few bucks. I got some black, the powder kind, cos they didn't have the liquid (not that it matters). I ended up using a large metal coffee can, cos you can't eat out of a pot after you've dyed in it. I just got it almost boiling, then tied up the parts in some 18awg wire, and dipped it in. I did both grips together so they would have the exact same shade of black. I'd dip them for a minute or two, then I'd pull up the wire and check them. It took a while. For the first few sets of dips, they insisted on being this intense flurple color, but after a while they threw in the towel and turned black.
and here's the flash version:
That's black, yo!
So it turned out pretty successful!
To anyone doing this, I would encourage you to not leave your parts unattended, and check them often. I would also suggest, assuming your grips didn't explode when you took them apart, that you screw them back together before you dye them. Just in case you get explosive diarrhea in the middle of your dye session, and need to leave them for 5 or 10 minutes, there's a better chance of them fitting together if they warp. Lastly, and perhaps most importantly, make sure you check under where the wires are tied (if you're using wires) to make sure that the dye is getting in there. In my case, I had light spots under the wire, and had to retie them and redip them a few times to get those spots black. You could use a strainer instead, but then you can't use it for food again. A large enough strainer would allow you to dye without the plastic parts touching the hot bottom of the pot.
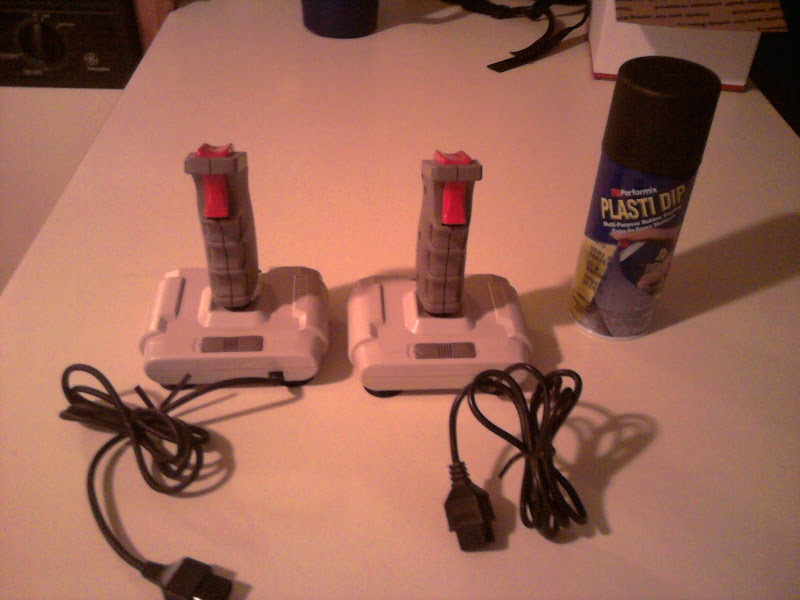
So yeah, I decided that the dye was so great, I'd dye my upper controller casings, which would solve my misgivings about having them poking up out of the case, what with their grayness and whatnot.
Here's where things go wrong.
I would like to proclaim that the following was 100% user error, and do not reflect your intended or expected results assuming that you are not, in fact, an idiot. Also, I had previously cut a piece out of one of them.
Your results may vary.
So, um, a delivery guy showed up, carrying delicious burgers. The pieces were taking a long time to dye, since they were so light originally, so I decided to eat my tasty burger. Downstairs. Bad idea. When I got back, they were nice and black, but also nice and warped. I've learned from this that dipping and checking has an important additional function. It allows the plastic to cool while you're checking the color.
So now the brakes have been officially put on this aspect of the project, until I can get a new pair of quickshots, fashion a swivel for the current sticks with a dremel, or figure out a way to unwarp the existing pieces. I'll tell you this, if I do get a new pair, the cases are going right back into the dye. I'll just make sure to eat first.
Edit: I just bought 3 from the same seller on ebay. Let's hope I can get the screws out ok this time. I've got 2 more boxes of dye, so I can blacken stuff until the cows come home..
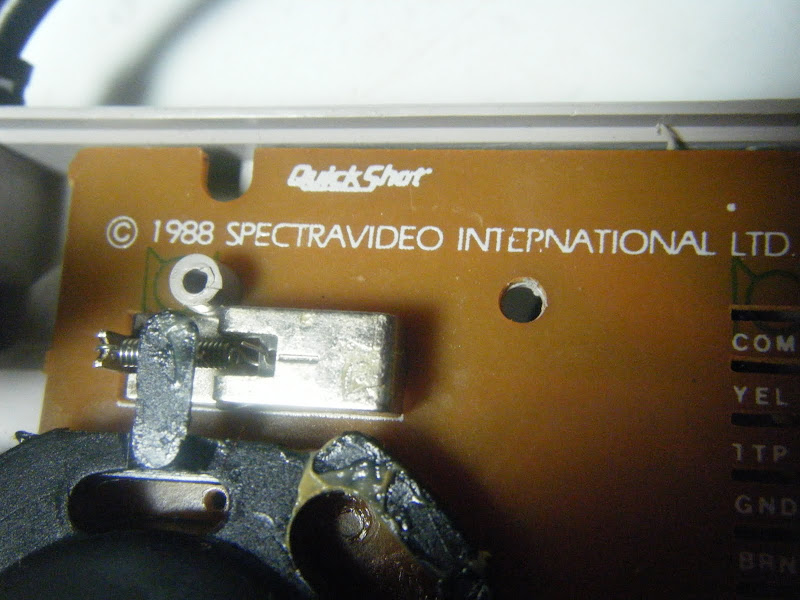
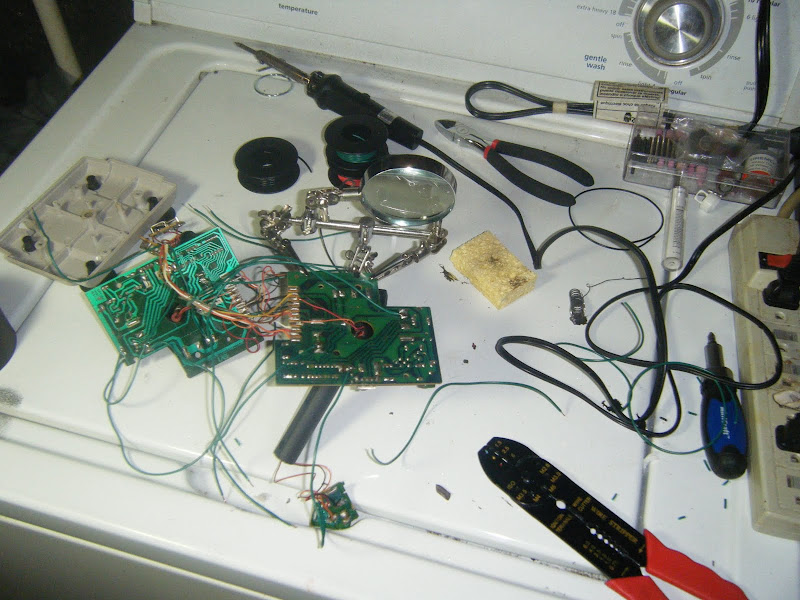
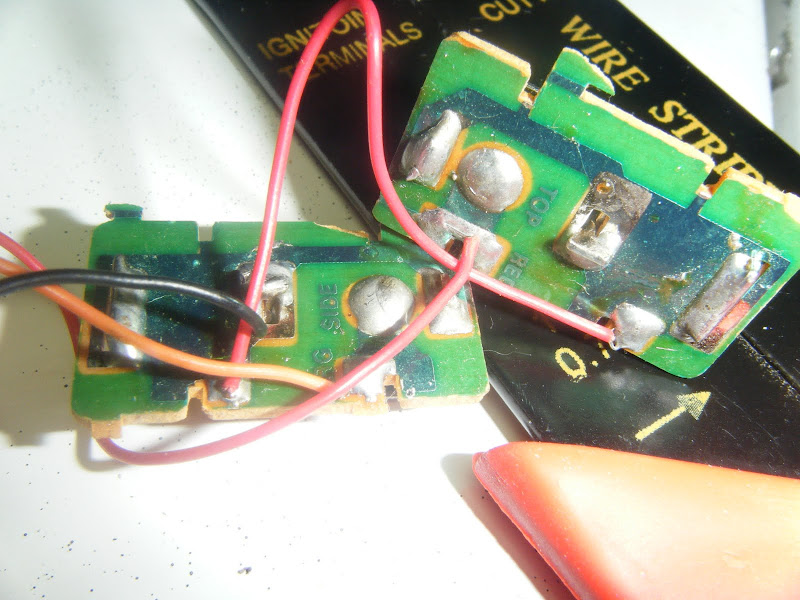
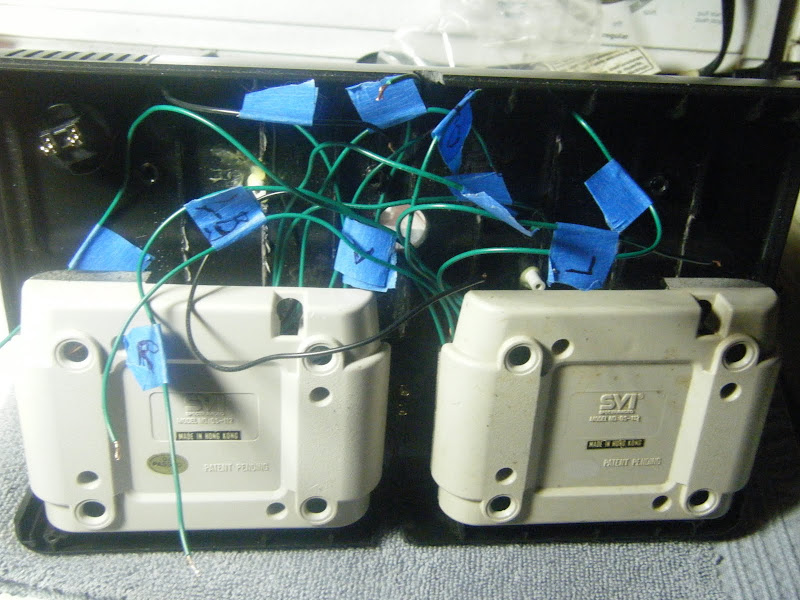
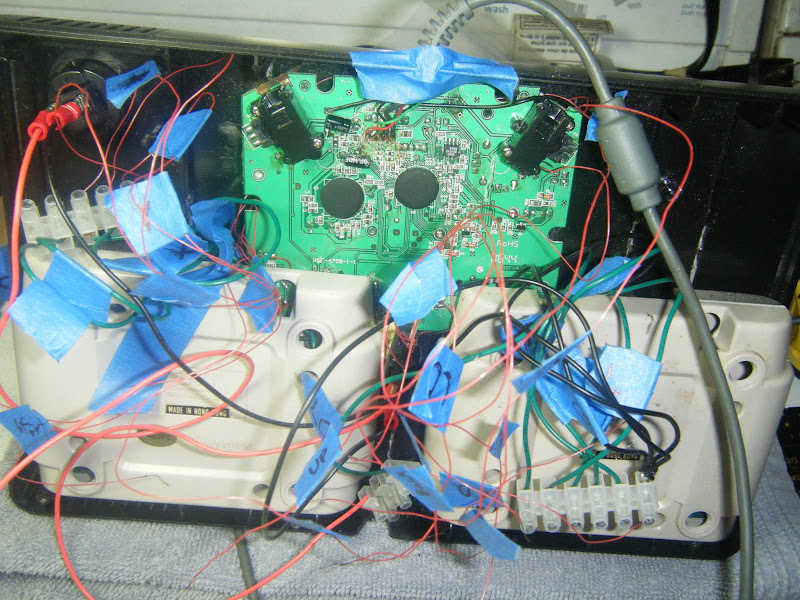
About the wire soldering, I did it following MetholMoose's instructions, and using the diagram from slagcoin. I also ordered some euro style terminal blocks, so I wouldn't have to twist 30awg single strand wire (360 jumpers) with stranded 22awg wire (on the quickshots when I do them), and to keep things organized. I labeled them with a fine tip sharpie. In case you're wondering, "G" is for ground. My 360 wires all have little masking tape flags to denote which wire is for which button/direction, so it'll be pretty much plug and play when it's done.

That's pretty much all I can think of to mention, but I will post as things progress!
Bill
Edit (6/15): The 3 replacement Quick Shot joysticks I ordered came in today, so I'll be making with the dyeing (assuming I'm not too busy putting decals on the sides of my Neo Geo machine...they came in yesterday) ....too many projects! At least I'll have a buttload of spare joystick parts, should I ever need them.
(Continued below)


